Vundle 插件管理器
在历史长河中,原始的安装 Vim 插件的方式是将从网络上下载的插件文件夹放在 ~/.vim 下,然后编辑配置 ~/.vimrc 文件的过程,当然如果发现插件更新就需要重新下载重新拷贝。由于所有的插件文件都被存储在同一个目录下,所以安装多个插件时,不同的插件文件之间会相互混淆。因而,跟踪和管理插件会是一个恐怖的任务。为了简化配置工作,使用插件管理器会是非常明智的选择,而 Vundle 就是其中的佼佼者。
Vundle 是 Vim bundle 的简称,是一个 Vim 插件管理器。Vundle 为每个插件创建独立的目录树,并在相应的插件目录中存储附加的配置文件。因此,各插件相互之间没有混淆的文件。简言之,Vundle 允许你安装新的插件、配置已有的插件、更新插件配置、搜索安装的插件和清理不使用的插件。所有的操作都可以在一键交互模式下完成。
安装和配置
安装
在 Linux 系统上安装 Vundle 需要 Git 支持(请自行安装)。然后在终端中输入以下命令:
git clone https://github.com/VundleVim/Vundle.vim.git ~/.vim/bundle/Vundle.vim
其他系统版本安装请参考 官方文档 。
配置
在 ~/.vimrc 文件的顶部,加入如下内容,启用 Vundle 插件管理器:
set nocompatible              " be iMproved, required
filetype off                  " required

" set the runtime path to include Vundle and initialize
set rtp+=~/.vim/bundle/Vundle.vim
call vundle#begin()
" alternatively, pass a path where Vundle should install plugins
"call vundle#begin('~/some/path/here')

" let Vundle manage Vundle, required
Plugin 'VundleVim/Vundle.vim'

" The following are examples of different formats supported.
" Keep Plugin commands between vundle#begin/end.
" plugin on GitHub repo
Plugin 'tpope/vim-fugitive'
" plugin from http://vim-scripts.org/vim/scripts.html
" Plugin 'L9'
" Git plugin not hosted on GitHub
Plugin 'git://git.wincent.com/command-t.git'
" git repos on your local machine (i.e. when working on your own plugin)
Plugin 'file:///home/gmarik/path/to/plugin'
" The sparkup vim script is in a subdirectory of this repo called vim.
" Pass the path to set the runtimepath properly.
Plugin 'rstacruz/sparkup', {'rtp': 'vim/'}
" Install L9 and avoid a Naming conflict if you've already installed a
" different version somewhere else.
" Plugin 'ascenator/L9', {'name': 'newL9'}

" All of your Plugins must be added before the following line
call vundle#end()            " required
filetype plugin indent on    " required
" To ignore plugin indent changes, instead use:
"filetype plugin on
"
" Brief help
" :PluginList       - lists configured plugins
" :PluginInstall    - installs plugins; append `!` to update or just :PluginUpdate
" :PluginSearch foo - searches for foo; append `!` to refresh local cache
" :PluginClean      - confirms removal of unused plugins; append `!` to auto-approve removal
"
" see :h vundle for more details or wiki for FAQ
" Put your non-Plugin stuff after this line
打开 vim 软件,在命令行模式下键入 :PluginInstall 安装 ~/.vimrc 中的插件。安装过程会弹出一个新的分窗口,如下所示:
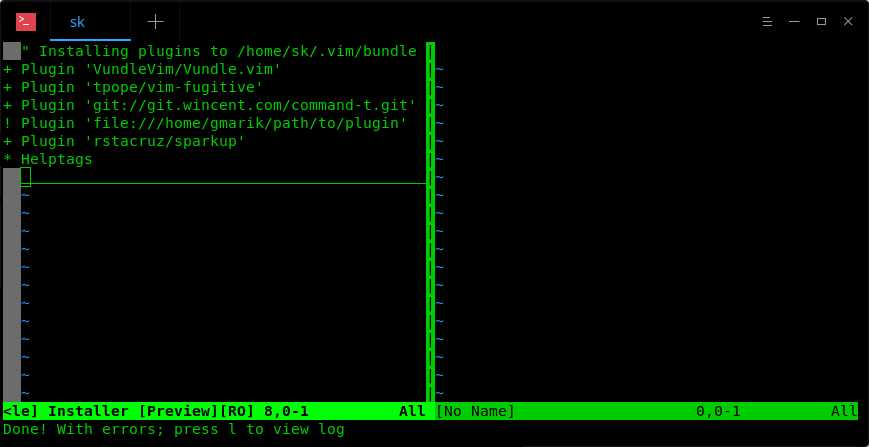
安装完毕之后,键入 :bdelete 命令,可以删除高速缓存区缓存并关闭窗口。
当然了,也可以在终端上直接安装插件,而不用打开 Vim 软件:
vim +PluginInstall +qall
管理插件
安装新插件
首先,使用搜索命令查找可安装的插件:
:PluginSearch vim-dasm
移动焦点到正确的行上,按下 i 键来安装插件。
插件安装完成后,需要在 ~/.vimrc 中添加这一行插件名信息,来正确的自动加载插件。
...
Plugin 'plugin-name'
...
如果明确知道需要安装插件的名称,可以直接在配置文件中加入 Plugin 'plugin-name' ,然后重新打开 vim 键入 :PluginInstall 安装插件。
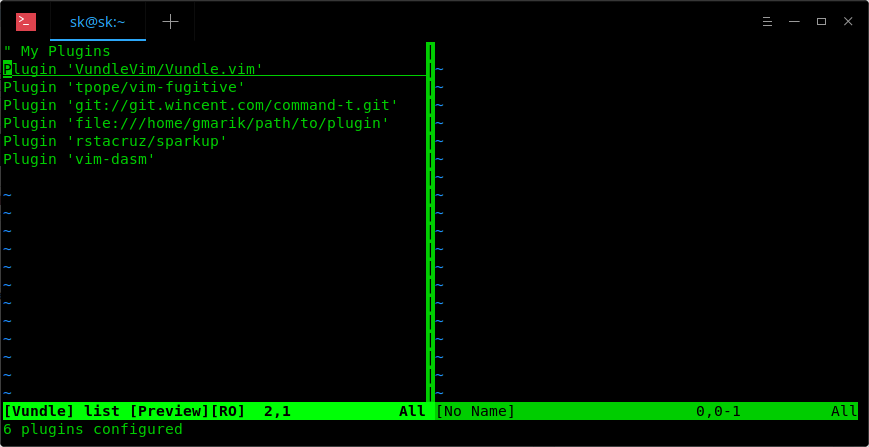
列出已安装的插件
键入 :PluginList 命令列出所有已安装的插件。
更新插件
:PluginUpdate 命令更新所有插件, :PluginInstall! 命令重新安装所有插件。
卸载插件
首先,列出所有已安装的插件 :PluginList 。然后将焦点移动到要卸载的插件上,按下 SHITF+d 组合键。
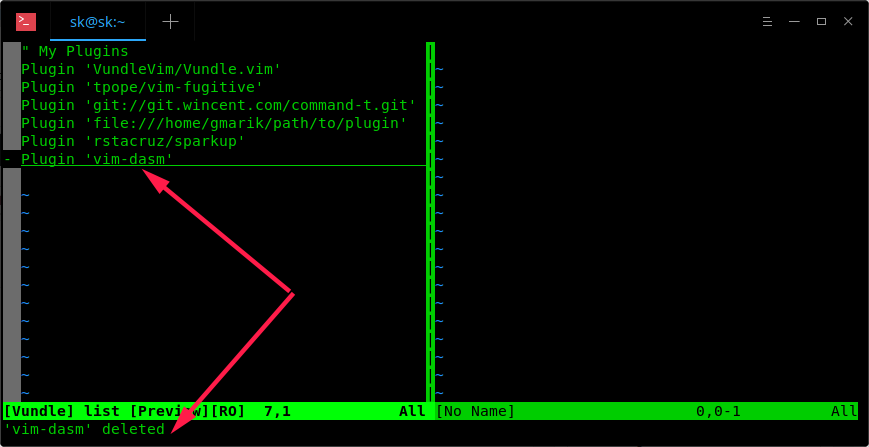
然后编辑 ~/.vimrc 文件,删除插件入口。
或者,可以在 ~/.vimrc 文件中删除插件入口,执行 :PluginClean 命令,卸载插件。这个命令将会移除所有不在 ~/.vimrc 中但是存在于 ~/.vim/bundle 目录中的插件。
查看帮助文档
使用 :h vundle 命令,查询 Vundle 帮助文档,获取更多细节。